
Appearance
Scheduling Assistant
Scheduling Assistant lets you plan meetings based on the availability of other staff and meeting rooms.
TIP
Meeting invites should be created in your calendar so that you become the meeting organizer
Quick Start
- Create a new meeting and choose the
Scheduling Assistanttab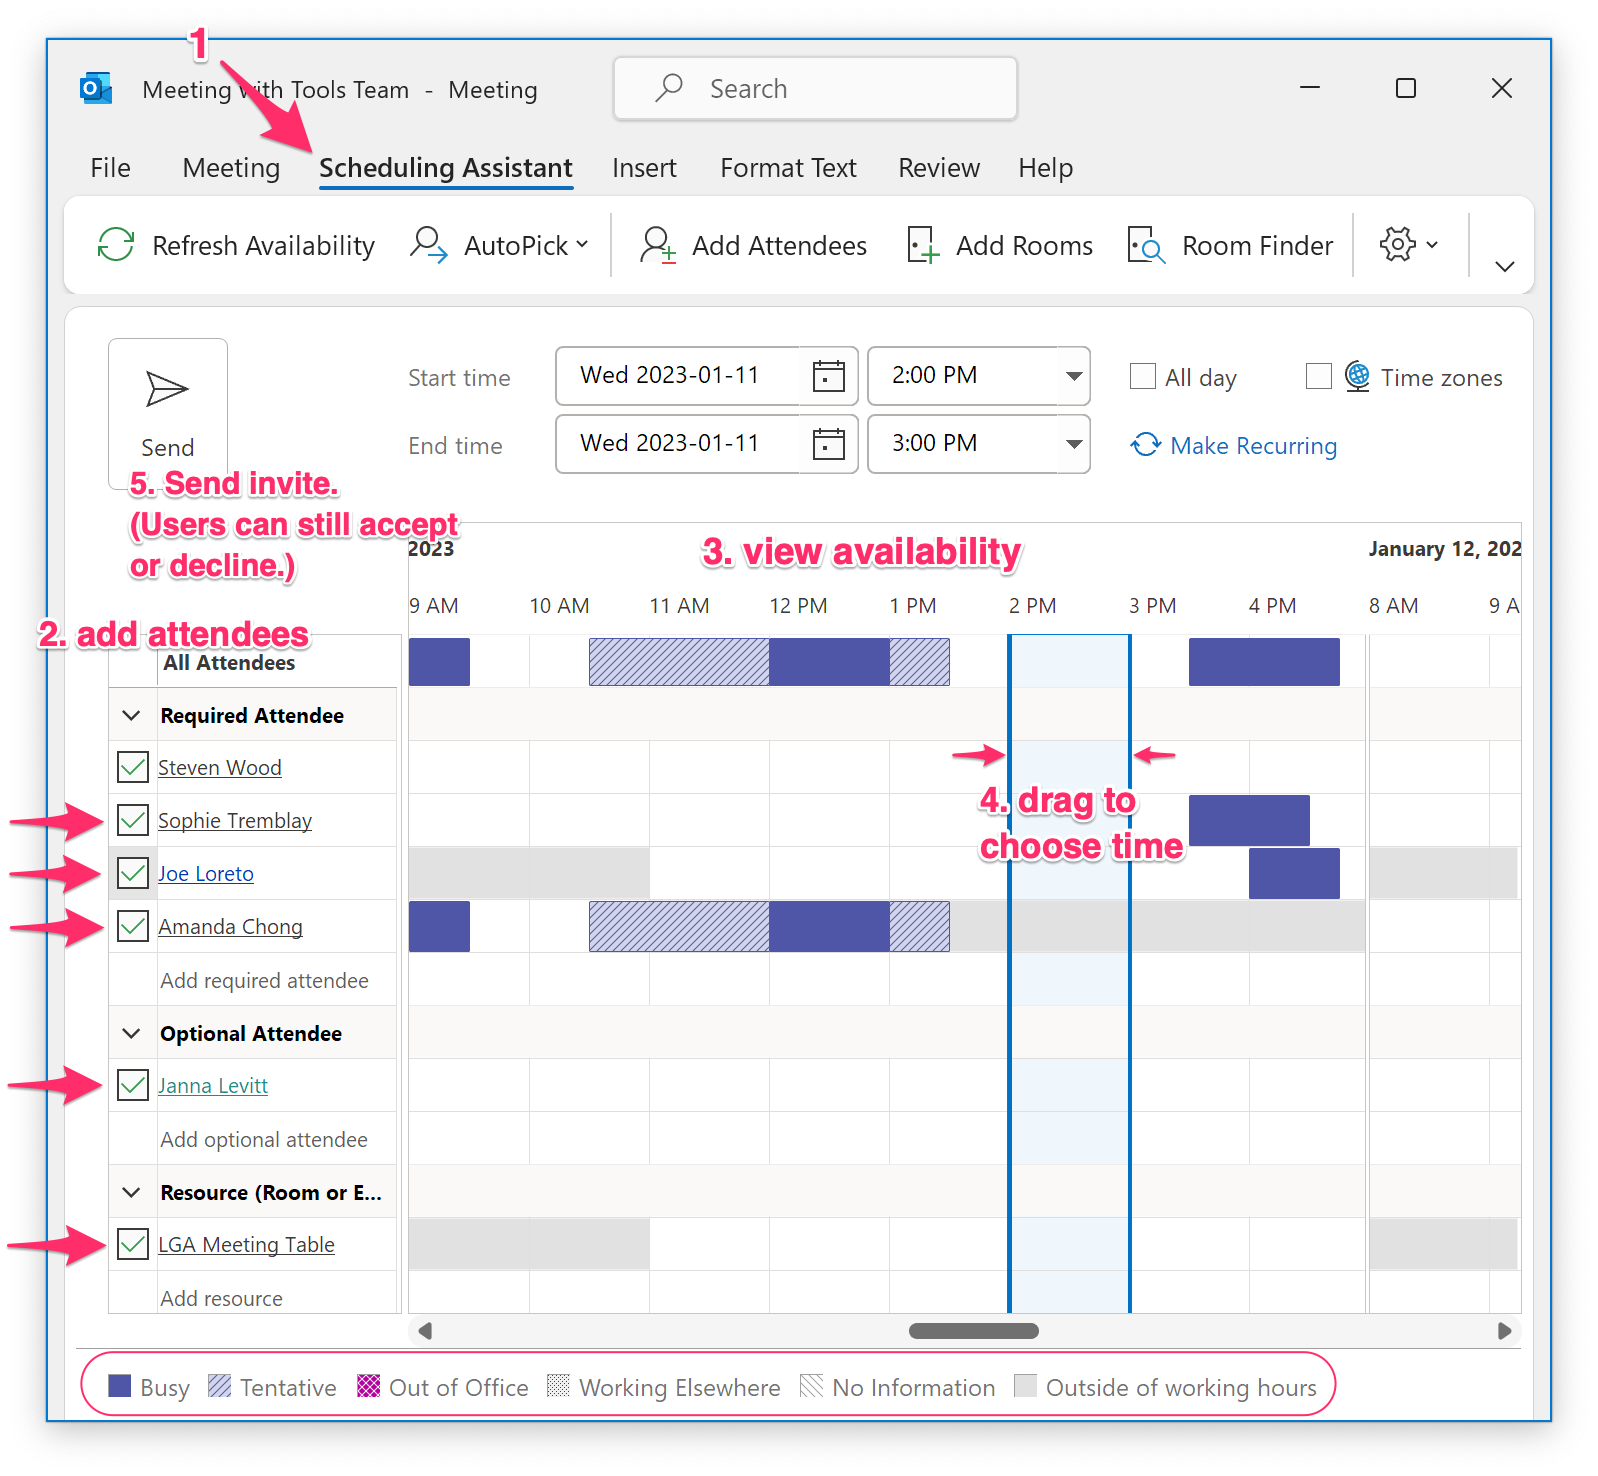
- Add Required and Optional Attendees by either entering them line by line, or using
Add Attendeesbutton. Optionally add Meeting Rooms usingAdd RoomsorRoom Finderbuttons. See also more information on Booking Meeting Rooms.
- Pick a meeting time according to people's availability by dragging the meeting range bars or using the drop down boxes
- Send the invite. Invitees will still accept or decline.
Your input matters
Scheduling Assistant relies on everyone keeping accurate free/busy information in their calendars. You should therefore:
- Enter your appointments.
- Set the
Show Asstatus on appointments. This determines how your availability is shown in the assistant. - Enter your out-of-office / vacation time. If you are going to be away, create an Appointment or All Day Event in your own calendar and set
Show Asto "Out of Office" or "Working Elsewhere" as appropriate.
Notes
- Others cannot see the details of your calendar, just your status.
Troubleshooting
Incorrect working hours
If your working hours are offset when viewed by others, or if others' are offset relative to you, time zone settings are usually to blame. Check your:
- Time zone in Outlook Web Calendar Settings
- Windows Time Zone:
Control Panel->Date and Time - MacOS Time Zone:
System Preferences->Date & Time - Outlook Desktop Time Zone:
File->Options->Calendar->Time Zones - Outlook Working Hours:
File->Options->Calendar->Work Time
❖